At the time of writing, I have done 125 nights under my Trakker Tempest 100 Brolly and am now using it for the 5th season. My version is the V2, which has since been updated. Here is my long-term review and experience of real-world use over 125 nights.
What Is The Trakker Tempest Brolly 100?
Before the long-term review, let’s introduce the Tempest 100.
The Trakker Tempest 100 Brolly is the latest evolution of the popular Tempest Brolly range. It offers a blend of innovation, practicality, and comfort, making it a market-leading shelter for carp anglers. As a direct successor to the acclaimed Tempest Brolly V2 (the version I have used for the past few years), the new Tempest 100 builds on a solid foundation, incorporating new design features and improved functionality.
One of the standout additions to the 2021 model is the inclusion of twin rear vents, allowing for improved airflow and ventilation in warmer conditions—an essential update for year-round anglers (the V2 didn’t have these air vents). The Brolly retains all the high-quality touches you’d expect from Trakker, including:
- Anti-twist poles for enhanced durability and setup reliability
- 10,000mm hydrostatic head waterproof rating
- Durable polyester fabric
- The signature GRP (Glass Reinforced Plastic) block design, now a standard feature across the range
The Tempest 100 Brolly stays true to its roots with an open-fronted design, but it’s far from basic. It’s highly adaptable to different weather conditions and angling styles, thanks to a wide range of optional extras such as:
- Skull Cap
- Skull Cap Wrap
- Social Cap
- Groundsheet
- Two interchangeable infill panels allow you to fully or partially enclose the front
This versatility means the shelter can be quickly tailored to suit day sessions, overnight trips, or extended stays.
Trakker’s renowned quick-erect system makes the Tempest 100 one of the fastest and easiest shelters to set up, saving valuable time on the bank. Whether dodging the rain or setting up in low light, the intuitive design helps you get sorted with minimal fuss.
My Tempest 100 Configuration
I have always used my Tempest Brolly 100 with the groundsheet and full infill panel. I only work overnight and always want to be as comfortable as possible to get a proper night’s sleep.
Groundsheet
The groundsheet for the Tempest 100 Brolly keeps the shelter inside dry, clean, and comfortable. It fits the footprint of the Brolly perfectly and pegs down using the same points as the shelter itself, so once it’s in place, it doesn’t move around or bunch up.
Made from a tough, weather-resistant material, the groundsheet protects against mud and dampness. The groundsheet is lightweight and easy to fold up. Doing overnighting is always more comfortable when a groundsheet is used. It stops the damp rising. If the grounds are wet beneath, it creates a dry floor, which makes the Brolly warmer to sit under. The only disadvantage is that it’s extra gear to carry and dry out; however, it folds up small, weighs little, and is easy to dry out, so there is no disadvantage.
Infill Panel
The infill panel transforms the Tempest 100 Brolly from a simple open shelter into a bivvy. It zips directly into the front of the Brolly.
Different versions are available, including a solid fabric panel that matches the Brolly’s main material for full weather protection and a mesh version ideal for warmer conditions—letting air flow through while keeping out unwanted insects.
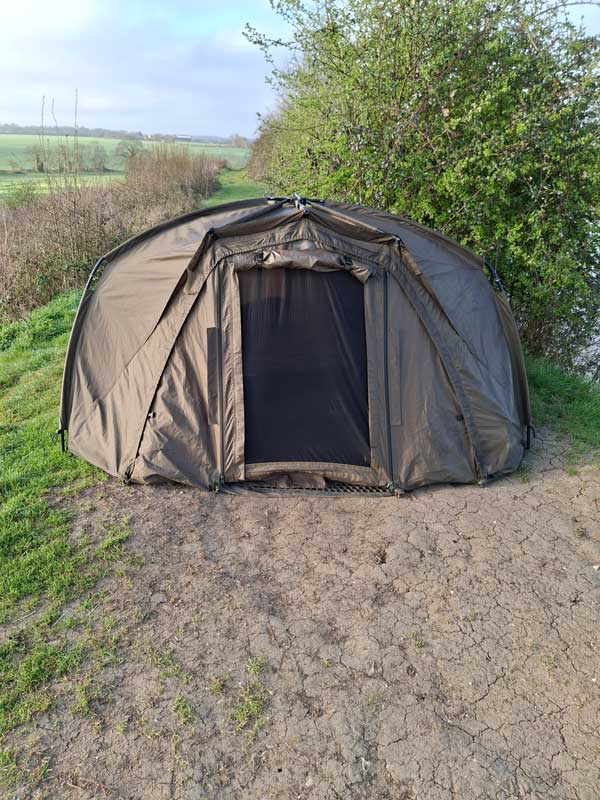
I have the solid fabric type, which includes a door, and a panel on the door can be rolled up to reveal a mesh window. The inner panel is permanently attached to the Tempest. The Tempest fits in its bag with the infill panel attached.
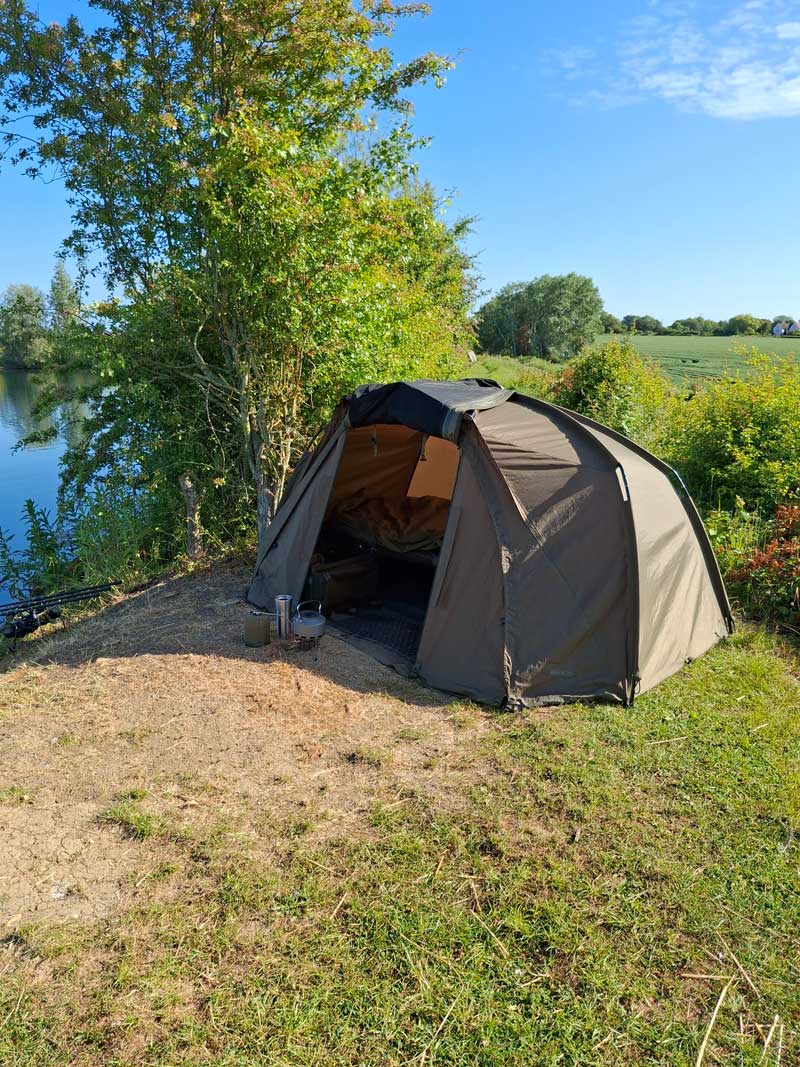
Most nights, I have the door zipped down, with the panel up and mesh exposed. This lets through airflow and keeps insects out. I can also see through it. I might have the panel down for full protection on really wet nights. This setup has kept me warm and dry on wet nights, never letting any water in.
On warm nights, I may have the door rolled up, and the infill panel clipped to the sides as an open brolly.
Skull Cap
The Skull Cap is a popular addition to the Tempest. Most anglers on the bank with a Tempest have a skull cap attached. The Skull Cap clips onto the top of the Tempest 100 Brolly to create an extra layer of insulation, helping reduce condensation inside while offering a shaded peak that keeps rain off the door—even when it’s open. I don’t have one and have never used one. I like to keep my kit as lightweight and small as possible, so I opted for the V2 instead of the Tempest 100T (taller version) and didn’t opt for a Skull Cap.
Using The Tempest 100 Brolly
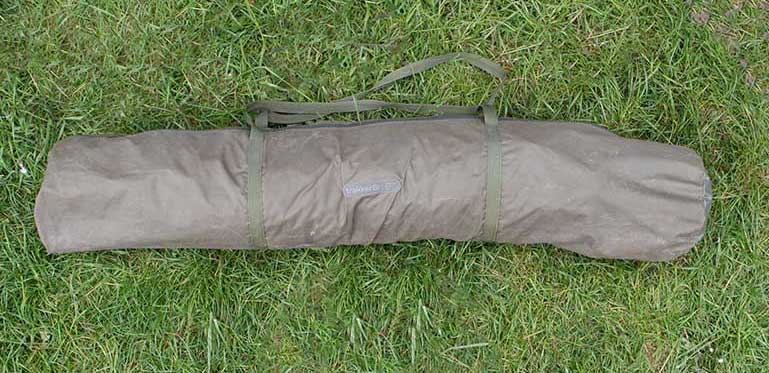
The Tempest brolly with the infill panel attached fits into the provided bag. The bag is small and goes on the barrow, as does the ground sheet.
Once the rods are out, the Tempest goes up. Here’s the procedure.
- Groundsheet is played on the ground.
- The rucksack is placed in the back corner.
- The Rod bag (Trakker 5 Rod Sleeve) is placed next to the rucksack and runs along the length of the groundsheet.
- My bedchair (Solar SP C-Tech) is next to the rod bag.
- The barrow, tidy from my barrow, is placed in front of the foot of the bedchair.
- The Brolly is folded out of the bag, and the five non-twist poles are fitted together.
- The Brolly is folded, and the securing bar is pulled over.
- The Brolly is placed over the ground sheet and clipped on both sides. (The groundsheet has two hooks that connect to the Brolly)
- The Brolly is pegged. I usually use 8 pegs; I might use less if the grounds are hard or there’s little wind.
- The process takes around 5 minutes (if that), and when it comes to packing up:
- The Tempest is unclipped from the groundsheet.
- The pegs are removed and placed back in their peg bag (provided by Brolly)
- The securing bar is undone.
- The Brolly is lifted off the groundsheet and folded.
- The 5 non-twist poles are undone and folded.
- The Brolly is rolled up and put into the bag.
- The bedchair, rod bag, rucksack, etc, is removed from the groundsheet.
- The groundsheet is folded.
Again, the process takes around 5 minutes (if that).
100% Water & Wind Proof
I have used my Tempest in heavy rain and winds up to 55mph and can honestly say that no water has ever entered (when the door is zipped down with a panel over the window), and it has held fast in the wind. I have never had to use storm rods with it. (The Brolly has two storm caps built-in, so storm rods can be used).
The Cons Of The Trakker Tempest Brolly 100
The Trakker 100 Brolly is the smallest shelter in the Trakker range, and I find a few things slightly annoying about using the Brolly.
Putting the brolly flaps under the groundsheet isn’t a design fault. The flaps help create a more watertight/dampproof environment inside, but going around the outside and placing the flaps under the groundsheet aren’t my favourite jobs when setting up.
Sometimes, the ends of my sleeping bag toughen the sides of the Brolly and get wet due to condensation. Again, it’s not a design fault, but I could probably eliminate this by pulling the bedchair forward. I could also reduce the condensation by adding the skull cap.
Conclusion
The Trakker Tempest 100 Brolly has been extremely easy to use and reliable and has always kept me warm and dry and stood up to the wind. Regarding replacing my Trakker 100 Brolly, I’ll probably buy the new and improved version currently on the market. Overall, I’m very satisfied with it. I think it’s an excellent brolly/bivvy system, and I highly recommend it. The 100 is a brilliant shelter for short sessions/overnighters and those who want to travel light.
Click Here For Trakker Tempest 100 Brolly Prices & Availability